Rapberry pi lens comparation

With the release of the new Raspberry Pi High Quality Camera, you have the option to use different CS-mount senses with your Raspberry Pi. The High Quality Camera is a 12,3 M sensor with a 7.9 diagonal image size, enough for hobby projects and learn about digital photography.


Take a look in the official product page: https://www.raspberrypi.org/products/raspberry-pi-high-quality-camera/?resellerType=home

The camera have a CS-mount ring adapter and a C-mount, I remember the first time that I got the camera, and when playing with the 9 min and 16 min lenses I got frustrated because I don't remember that you have to use the ring adapter for the 16 min.

Check the official documentation to see how to mount the adapter ring for different lenses.


Camera Specification

Sensor:    12,3 megapixels

Output    RAW, COMP8

Back Focus:    12.5 mm - 22.4 mm

Lens Standard:    CS mount, C-mount ( C-CS adapter included )

Tripod mount:    1/4"

LENSES

A lens is a device that have a different amount of lenses inside, divergent  and convergent, and with the most cases you can modify the shutter and the focus, there are 3 main topic that you have to adapt to take in consideration before you capture a photograph:
  • Luminosity,  
  • F number, 
  • Focal distance, 

In this picture, you can see the vision angle of different lens focal distance. You can see the relation between a focal distance of the lens and the vision angle raised by the following type of lenses; the numbers of the bellow diagram represent the following lens type:
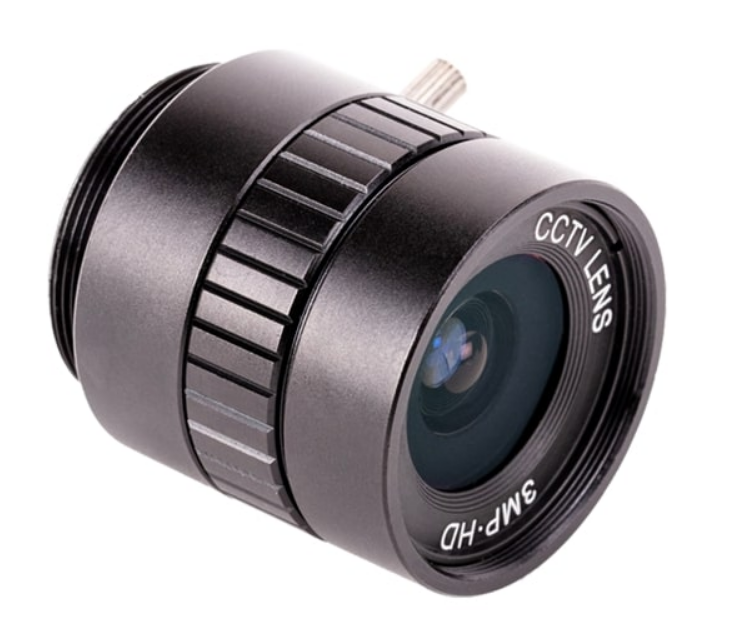
1.- Fish Eye, an extreme wide-angle lens with a strongly convex front element.
2.- Wide angle lens
a lens that reproduces perspective that generally looks "wider" than a normal lens.
3.- Normal Lense,  a lens with a focal length about equal to the diagonal size of the film or sensor format, or that reproduces perspective that generally looks "normal" to a human observer.
4.- Telean optically compressed version of the long-focus lens. 
5.- Super Tele,

16mm C-Mount Lense

This lens provides a higher quality image than the 6 mm lens but it offer a narrow angle of view which is more suited to viewing distant objects.
This lense comes with a Back focus ring to adjust with a litter screw, you have to screwed it fully once mounted in the camera, this ring is to ensure that the focus will be hard fixed while you adjust the aperture or focus manually.

  • Resolution: 10 mpx
  • Picture Format: 1"
  • Focus Distance:  17.53mm
  • Aperture:  F1.4-16
  • Mount: C Type
  • Dimensions: 39x50 mm
  • Mode: Manual
  • Minimum Macro Dist:  17.53mm
  • Weigh: 133.7 gr. 

  • Angle View:
    1" > 4.6°× 33.6°
    2/3" > 30.0°× 23.2°
    1/1.8" >  24.7°× 18.6°
    1/2" >  21.8°× 16.4°

6mm CS Mount

This lens is the low cost Wide Range version of a raspberry pi lens for the new high quality camera, it's suitable for basic photography and it offer also the possibility to do macro photography because it can focus objects at very short distance.

  • Resolution: 3 mpx
  • Picture Format: 1/2"
  • Focus Distance:  7.53mm
  • Aperture:  F1.2
  • Mount: CS Type
  • Minimum Macro Dist:  7.53mm
  • Dimensions: 30x34 mm
  • Mode: Manual
  • Weigh: 53 gr. 
  • Angle View: 63º


What we can do with this lenses ?

If you check the previous diagram, you will see that we have 2 lens for our Raspberry, 16 mm and 6 mm, if you try to category by the lens type both have to be places as a type 1, Fish Eye type but there are more factors that we have to consider.

As you can see, the 6 mm lens is a basic one for normal photograph pictures. The 16 mm is a very good one but more expensive but it's not a real Tele lense like a large one that have a focus near to 135 mm.

Even that, if you would like to learn about photography bot are very good for it, and if you try to adjust them dynamically using a python program you will have a loot of options to play with Aperture, ISO, exposure, etc... for example to take long expose pictures.

Check this offer from Waveshare where they have other lenses avairables. 

Waveshare Quality Industrial Telephoto Lens with 16mm Focal Length, Multi Field Angle and C-Mount Compatible with Raspberry Pi Camera…


  • 16mm C-Mount Telephoto Lens For Raspberry Pi High Quality Camera
  • 16mm Focal Length High Definition Telephoto Lens, Capturing Every Tiny Details
  • Fitting The Lens To Raspberry Pi High Quality Camera (C-CS Adapter Required)
  • To use with Raspberry Pi Zero, you need to buy an additional Raspberry Pi Zero v1.3 Camera Cable


Scrap Twitter member list using Tweepy in Raspberrypi

Problem: 
You need to populate date in a website and the source of this information is stored in a Twitter list, you need to read information of members in this list.

Solution:
You can do that scraping the information using Tweepy library, this library help to read information from twitter in a legal way.

First, you will need to create a Twitter app and register the corresponding tokens, etc...
Create you twitter application here: https://developer.twitter.com/en/portal/projects-and-apps 

This is a sample code to download the name of members in a specific list.

#Twitter bot to read information of members in a list
v_access_token = "**********"
v_access_token_secret = "**********"
v_consumer_key = "**********"
v_consumer_secret = "**********"

import tweepy

auth = tweepy.OAuthHandler(v_consumer_key, v_consumer_secret)
auth.set_access_token(v_access_token, v_access_token_secret)

api = tweepy.API(auth)

public_tweets = api.home_timeline()

slug = 'Twiter-List-Name'
owner = 'Twiter-Name'
list_id = 1153378345425632898

members = []

for page in tweepy.Cursor(api.list_members, list_id=list_id).items():
  members.append(page)
  print("@"+page.screen_name)

Tips for using SSH effectively on Raspberry Pi

SSH is a common secure type of remote connection to access to servers or other computers in the same or different network, it's important to remember this few tips for using SSH effectively; you will need it to connect to your Raspberry PI if you don't use a display.
Let's see a few of them:

  • The two-factor authentication for SSH.
  • Use safe agent-forwarding.
  • Exit out of SSH session.
  • leave the terminal open on disconnecting.
  • share a remote connection with friend mates.


Let's start with the first point, you will see that there are different ways to add a second factor for SSH authentication and ensure in this way your connection.


1.- Use hardware tokens (USB Key).

Around February 2020, support for Universal Second Factor tokens was added to OpenSSH connection. This is a great new feature, but there are thinks that we have to consider before to use it.

Around February 2020, support for Universal Second Factor tokens was added to OpenSSH connection. This is a great new feature, but there are thinks that we have to consider before to use it.

Since this update adds new key types to support tokens, it can only be used if you update both the client and server. The current version of the client can be checked with the command ssh -V, for the remote server it depend of the OS, check your OS information to know who to check it.

Two new types of keys were added - ecdsa - skand ed25519 - sk . To create key files, insert your token into your computer and run the command$ ssh -keygen -t ecdsa-sk -f This command will create the public and private keys associated with your token. The private key on the device is used to decrypt the private key file stored on disk.

Also, as a second factor, you can set a password for key files. OpenSSH supports another variant of key generation, a'resident' key. In this case, key files are stored on a token. This way, you will always have your keys with you. 

To transfer a key file to a new machine, insert the key media and execute the command ssh-add -k. You will need to activate your token.

More information: https://www.ssh.com/ssh/key/


2.- Safe use of agent forwarding (UNTIL HERE, DRAFT)

SSH key forwarding gives remote host access to your local SSH agent. When your SSH client uses key forwarding, there are 2 channels in the connection:

- Your interactive session.
- The key forwarding channel.

The local SSH agent creates an IPC socket that connects to the remote host through this channel. This is dangerous because a root user on the remote host has access to your local SSH agent and can potentially use it to access network resources on
your behalf. With the standard SSH agent that comes with OpenSSH, you will never know what happened. But if you use a U2F key, you will be able to stop any attempts to use your SSH agent.

Even with this limitation, periodic use of key forwarding is perfectly acceptable.

Do not use this method for all of your connections. Use it only if you are sure you need it in specific situations.


3.- Exit out of SSH session

SSH sessions often hang due to network interruptions, loss of control of a program being executed, or one of the terminal escape sequences that block keyboard input.

Here are some ways to get out of a frozen session:

Automatic logout in case of network failure.

In your SSH configuration files [.ssh/config] you need to add the next command:

ServerAliveInterval 5
ServerAliveCountMax 1

ssh will test the connection by sending echo requests to the remote host every ServerAliveIntervalseconds. If more than ServerAliveCountMaxsuch requests go unanswered, SSH will close the connection.

In this situation you will have sure about the current situation in your server to avoid that any ssh connection remains open without your control.

Terminate the session.
SSH uses a character ~ as the default escape sequence. The command closes the current connection and returns to the terminal.
(remember that you can enter escape sequences only on a new line).

The command  ~? displays a list of commands that can be used in the current session. If you have a keyboard with multiple languages, you may have to press the button ~ twice to send this character.

Leave the terminal open on disconnecting

There are two options for how to save the session when you switch between networks or want to disconnect for a while:

Use Mosh or External Terminal.

If you really need a connection that doesn't drop even if you switch between networks, use Mosh - the mobile shell. Mosh is a secure shell that uses SSH to initialize a session and then switch to its own encrypted channel. This channel is very stable. It can handle a variety of situations, including internet disconnects, changing your laptop's IP address, high network latency, and more.

To use Mosh, you need to install it on both your server and client and open ports for incoming UDP traffic on your remote host. Then just dial mosh user@server connect.

Mosh works at the level of terminal screens and keystrokes, and this gives it many advantages over SSH, which transfers a binary stream of standard I/O between the client and server. If we need to synchronize only the terminal screen and keystrokes, then the interrupted connection can then be restored much faster. SSH would have to buffer and forward whatever happened, while Mosh would only need to store the keystrokes and synchronize the last state of the terminal window with the client.

More information: https://mosh.org/ 

Use tmux.

If you want to connect and disconnect as you please and keep the same session on the remote host, use the tmux terminal. If your SSH connection drops, just connect again and type tmux attach to return to your session tmux. It has some great additional features in tabs and panels, the same as in the macOS terminal and the ability to share the terminal with friends.

Some people improve tmux with Byobu, a package that adds many handy functions and keyboard shortcuts. Byobu ships with Ubuntu and is easy to install on macOS via the Homebrew package manager.

Read more
https://phoenixnap.com/kb/tmux-tutorial-install-commands#:~:text=Tmux%20is%20a%20Linux%20application,reattach%20to%20a%20running%20process.


Share a remote connection with friends:

When solving a complex problem in servers in different task, It would be useful to share the SSH session with someone else who is in a different location.

tmux is the best terminal sharing tool for that. So, you need to do the following:

Make sure it is tmux installed on your server.

You both need to connect to the server via SSH using the same account.
One of you must run tmux for the tmux session to be created .
Another has to execute the command tmux attach.

Sourcehttps://github.com/tmux/tmux/wiki

It's done ! You have shared the terminal.


Best Raspberry Pi HATs

I fount and article talking about different hat's that you can plug into a Raspberry Pi, I'll create a new page in this blog to collect all information, sources, and utilities of using this hat's; I don't use anyone of them so I can't talk about my own experience; I'll add my feedback once I have the choose to use them. 

This is the wish list:

  • Sense Hat; Acceleratometer, Magnetometer, Air Pressure and a few more
  • Automation Hat; plug and play with diferent type of outputs.
  • Pimoroni Unicorn; Just a led matrix hub, I don't like them a lot because you have tu put very close to the raspberry.
  • Adafruit Servo; as the name tell, control your step and servo motors.
  • pHat Beat; just a little Sound board.
  • HifiBerry DAC; co convert the digital signal to analog.
  • PoE Hat; if you would like to power on your raspberry over the internte, you need this. it's in my wish list.
  • Cluster Hat;to create server cluster
  • Uptime UPS; A funny solution to use as a external battery to protect and power your raspberry if there is any cut in the main power supply.
Links to the page with more detailed information cumming soon:


Next Raspberry Pi 400 board

Picture from pimoroni

We have a new board option in the Raspberry PI family, this new Raspberry Pi 400 is a new design option that offer the user the experience to have integrated in the same keyboard a new raspberry pi 400.


After around a year of the last Raspberry pi P4 release, this is a good new for ones and a huge deception for others.

The board is more powerful than the old PI4, and the case is itself a user keyboard in the same "case", as the new board is not squares, all the connectors included the GPIO are available in the same side, that makes this new system more accessible than other boards.

From a point of view of headless System, what we can say, the keyboard it’s totally useless if we follow the headless installation to put the raspberry as a server, as a IOT System, as a spy cam or similar; maybe we will see new plastic cases without he keyboard for a different use, but, it seams that this board don’t have the option to plug a camera directly to the board, you will need to plug it trough USB if you need one.

This new product is more oriented for kids that would like to play with a Linux  computer, it can be more accessible that other computers and/or laptop because you only need to plug the micro SD in the raspberry, plug the HDMI to a tv and start using it. I found it quit expensive compared if you acquired for example the P4 board with an external keyboard, I miss for example an display like we can see in old ebooks and the touch pad to avoid the use of the mouse; if this is a product for help kid to learn about computers, programming, etc… 

You can check it from Pimoroni web site:
https://shop.pimoroni.com/products/raspberry-pi-400-personal-computer-kit?variant=32280730206291
 

Why not to invest in a small and cheapest PI4 rather than more different boards ?

Xmas season, new staff to make gif to our geek friends.